
PPF the Right Way on this brand new Tesla Model Y Juniper
Should I invest the money on PPF for my Tesla? Why's it so expensive anyway?
“Paint Protection Film is necessary for preserving the finish if you want to drive the car on a regular basis.”
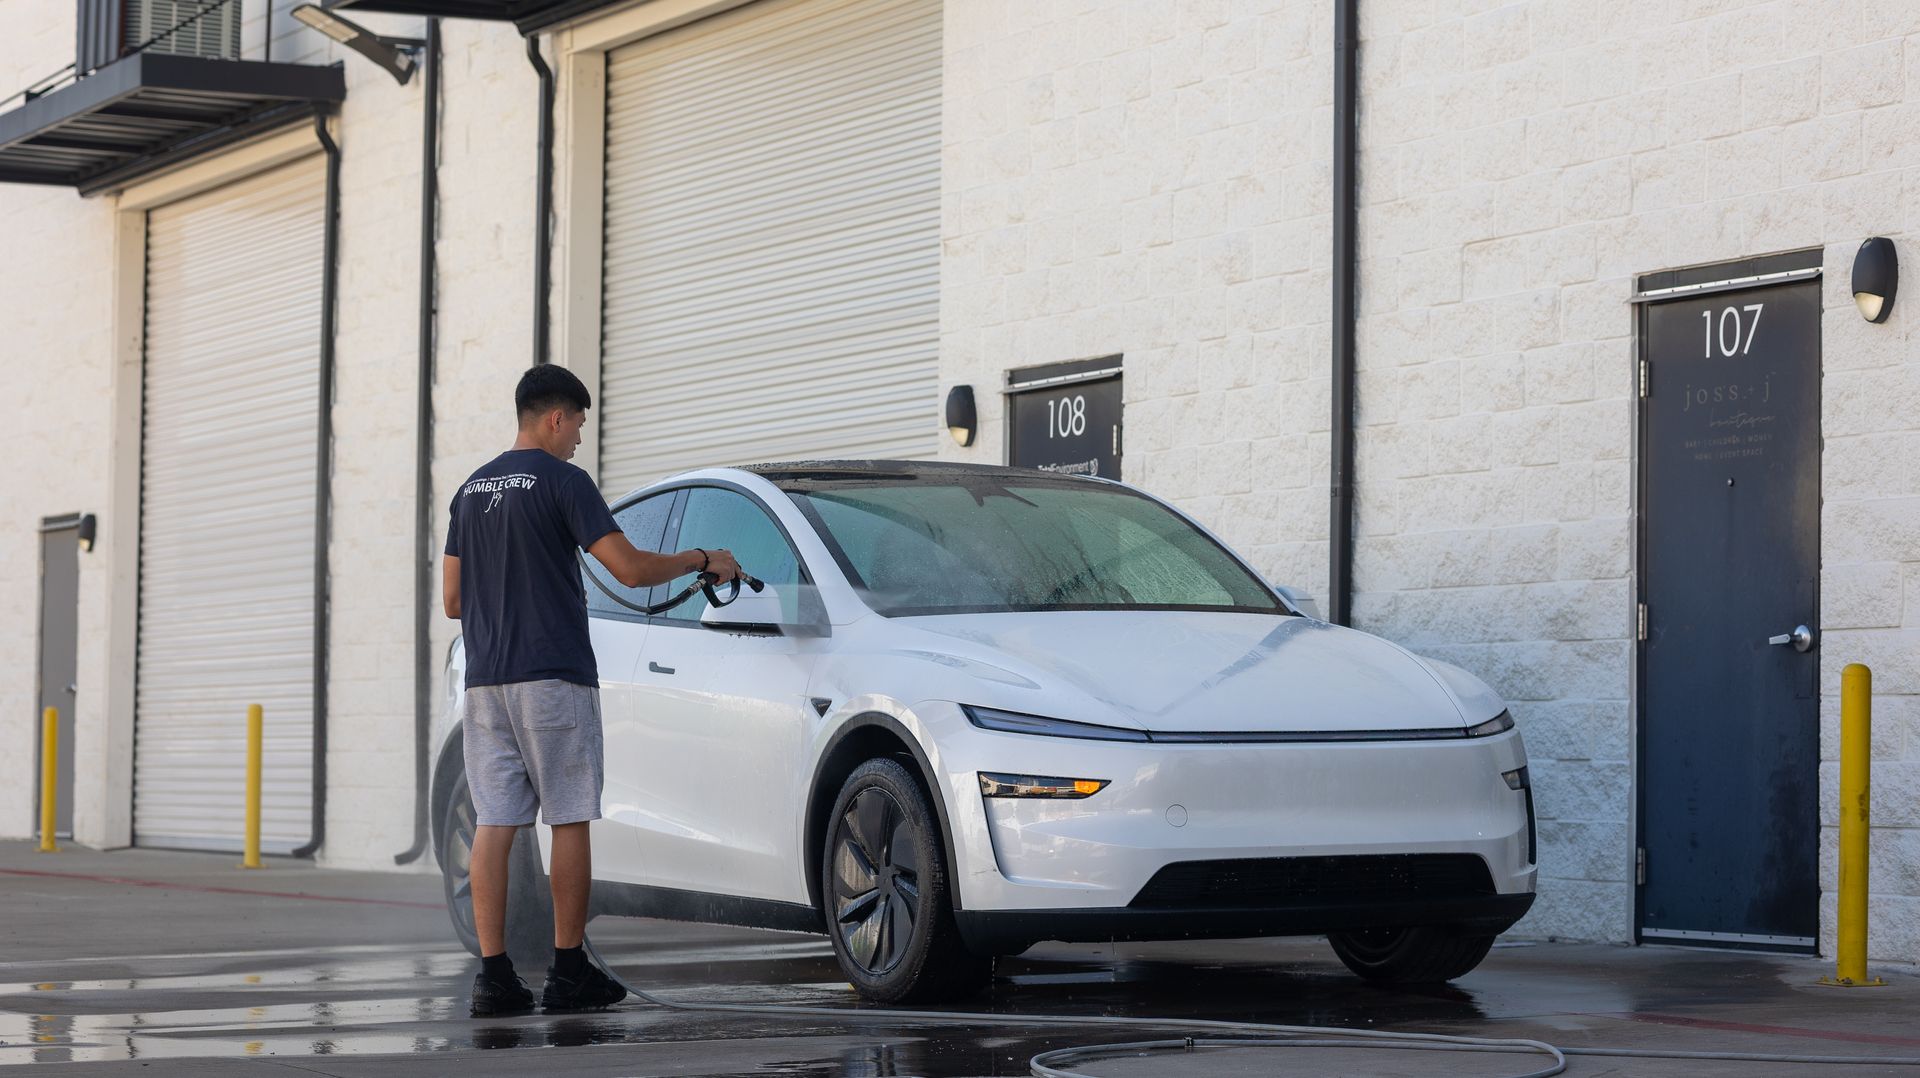
When a brand-new Tesla Model Y rolls into my shop, my first thought is always the same: Let’s make sure it stays looking brand new for as long as possible.
That was exactly the mission with this pearl white Model Y. The owner wanted long-term protection—something that could take the abuse of daily driving without ruining the clean, factory look of the car. So we went with one of the most effective tools in the industry: paint protection film, or PPF.
Now, if you're not super familiar with PPF, let me explain why I love it and why we install it the way we do.
Why I Recommend PPF Over Everything Else
PPF is a thick, self-healing film that goes directly over your vehicle’s paint. Unlike ceramic coatings, which mostly add gloss and slickness, PPF is all about physical durability.
You know those rock chips you get from highway driving?
PPF takes those hits.
Bug splatter and acidic bird droppings that etch into your clear coat?
PPF blocks them.
Brushes from shrubs when backing out of tight spaces, sand kicked up from trucks, even light scratches from fingernails or car washes—PPF eats it all.
And if you get minor hazy swirl marks? Heat or sunlight “heals” it right back.
To put it bluntly: it saves your paint. And a proper repaint—especially on a Tesla—isn’t cheap. A hood respray alone can cost anywhere from $1,200 to $2,500 and still might not match perfectly.
So why not prevent that bill altogether?
We Start With a Deep Decontamination—Not Just a Wash
Before we even think about laying film, the first step is always prep. And when I say prep, I don’t just mean a quick soap and rinse. I’m talking about chemical decontamination that breaks down everything hiding in or on the paint.
This Model Y got:
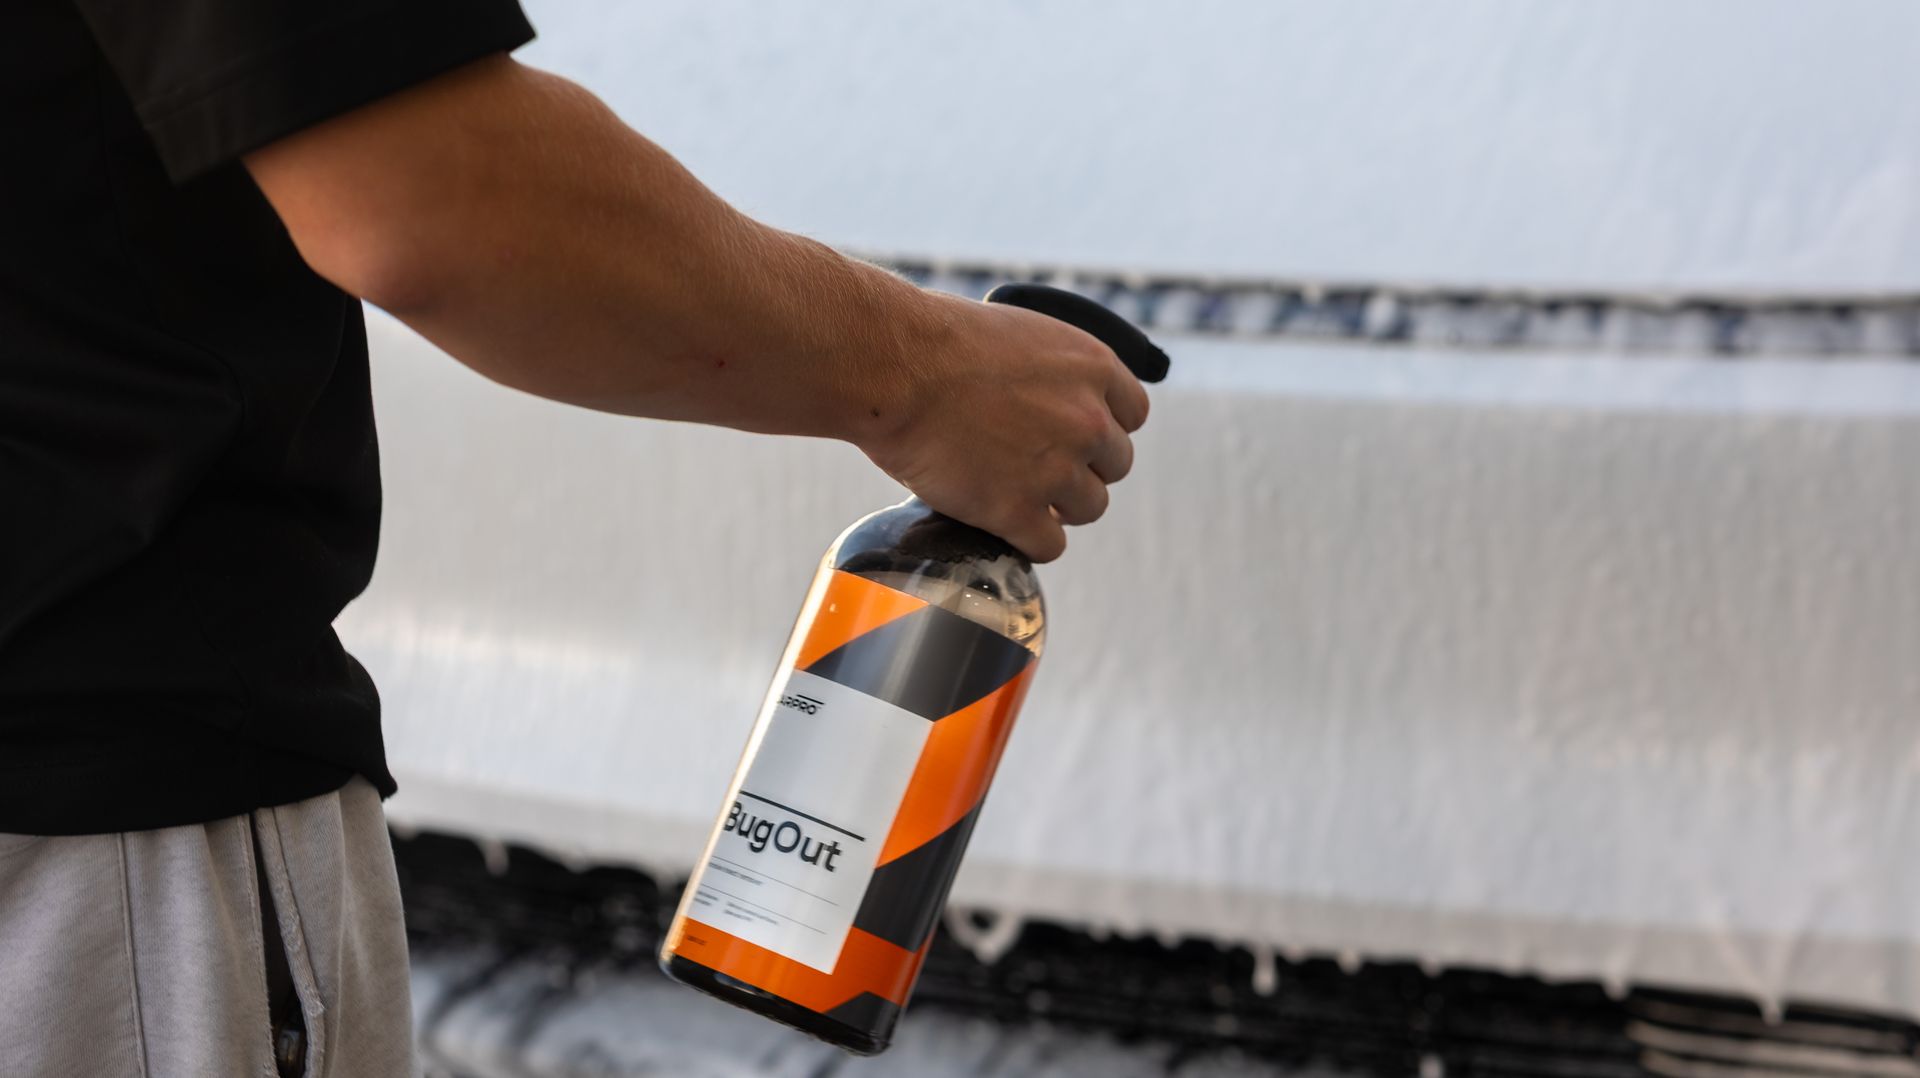
- Bug remover on the front clip to soften and remove acidic insect residue
- Iron remover (we used IronX here) to chemically dissolve embedded metal particles—those come from brake dust and industrial fallout
- A full foam pre-soak, followed by a contact wash with clean mitts
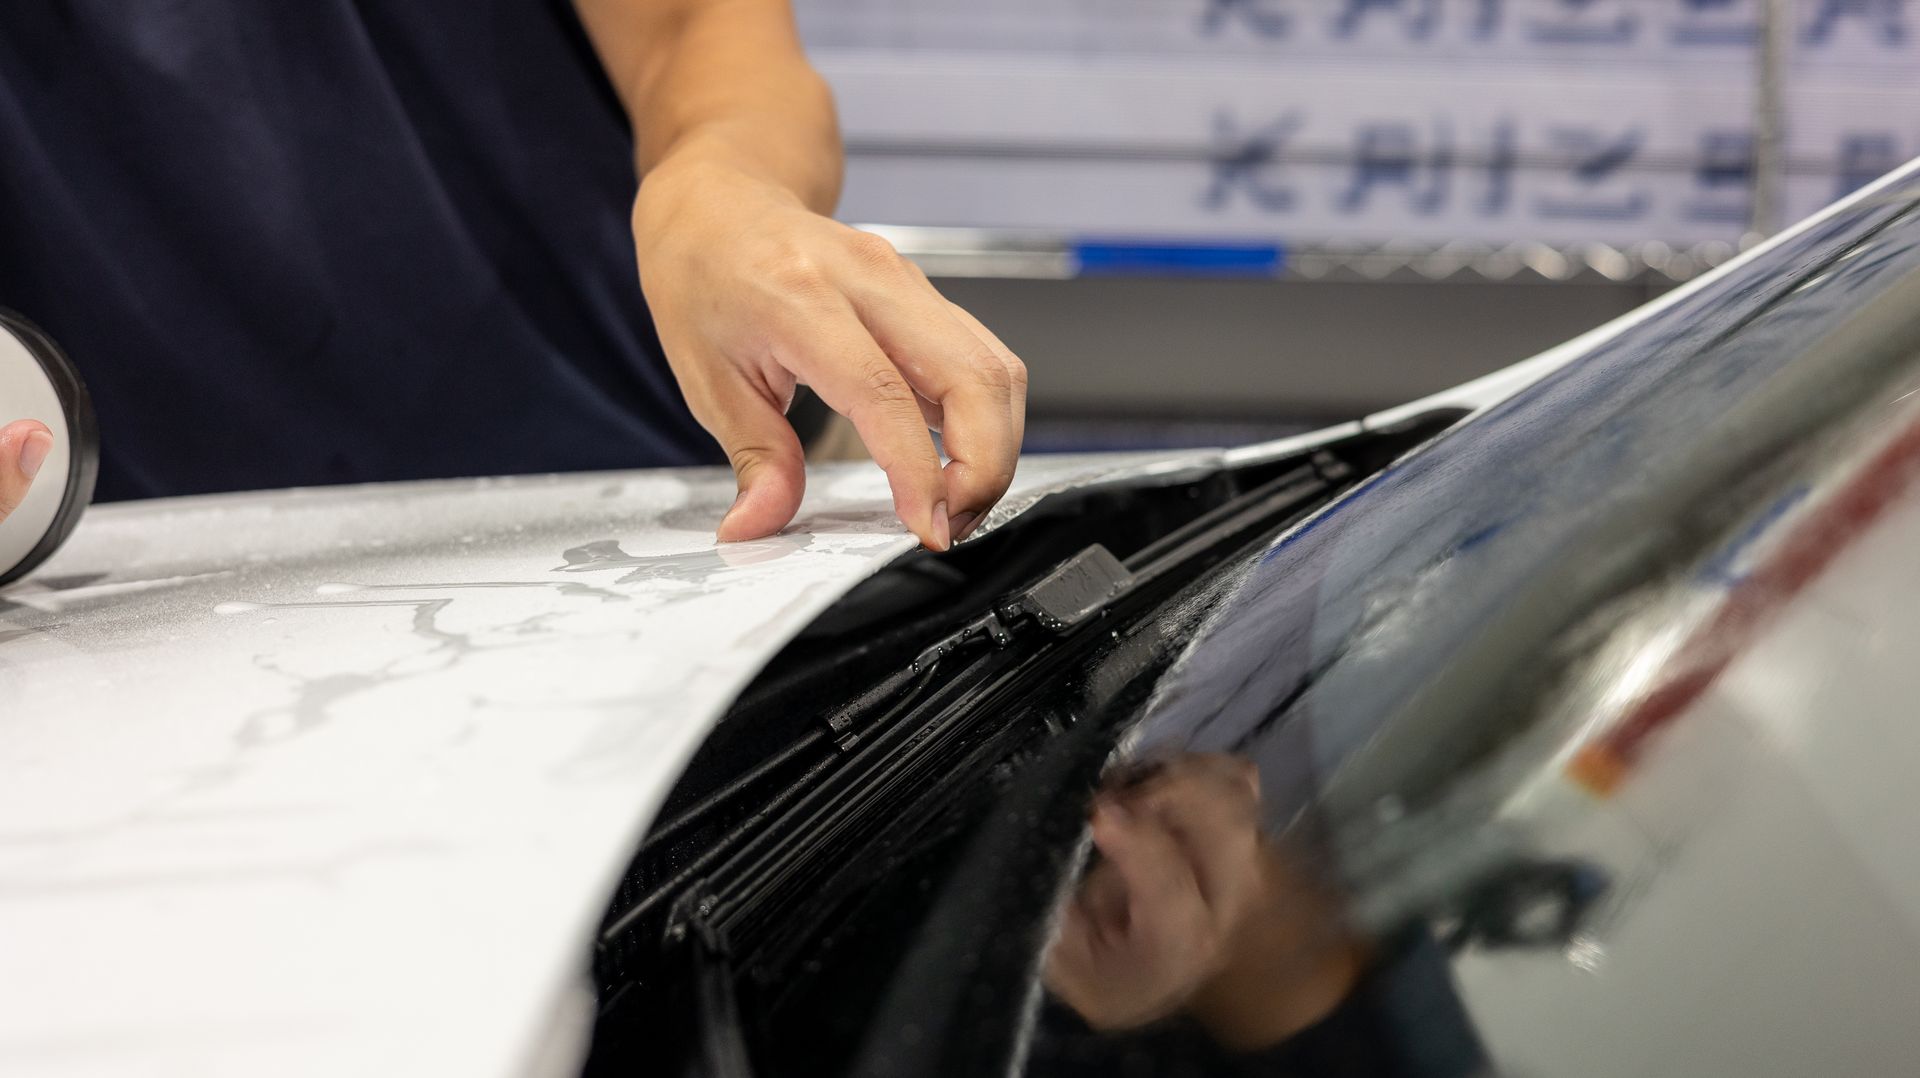
- Rinsing into every crevice—like under the windshield trim and inside fender gaps—so we don’t trap dirt under the film
If you skip this part, the film won’t lay clean. Worse, it might lift early or seal in debris that ruins the look. That’s not acceptable for me or for my clients.

Tesla Detailing Plano 1
A full three-bucket wash is included with every service from Humble Crew Auto Spa in Plano.
Tesla Detailing Plano 2
CarPro Bug Out dissolves imbedded bug guts in the paint, allowing us to fully remove the contaminant.

Tesla Detailing Plano 3
Iron Decontamination removes stubborn iron and dissolves them purple, which is then rinsed off the paint for a clean surface.
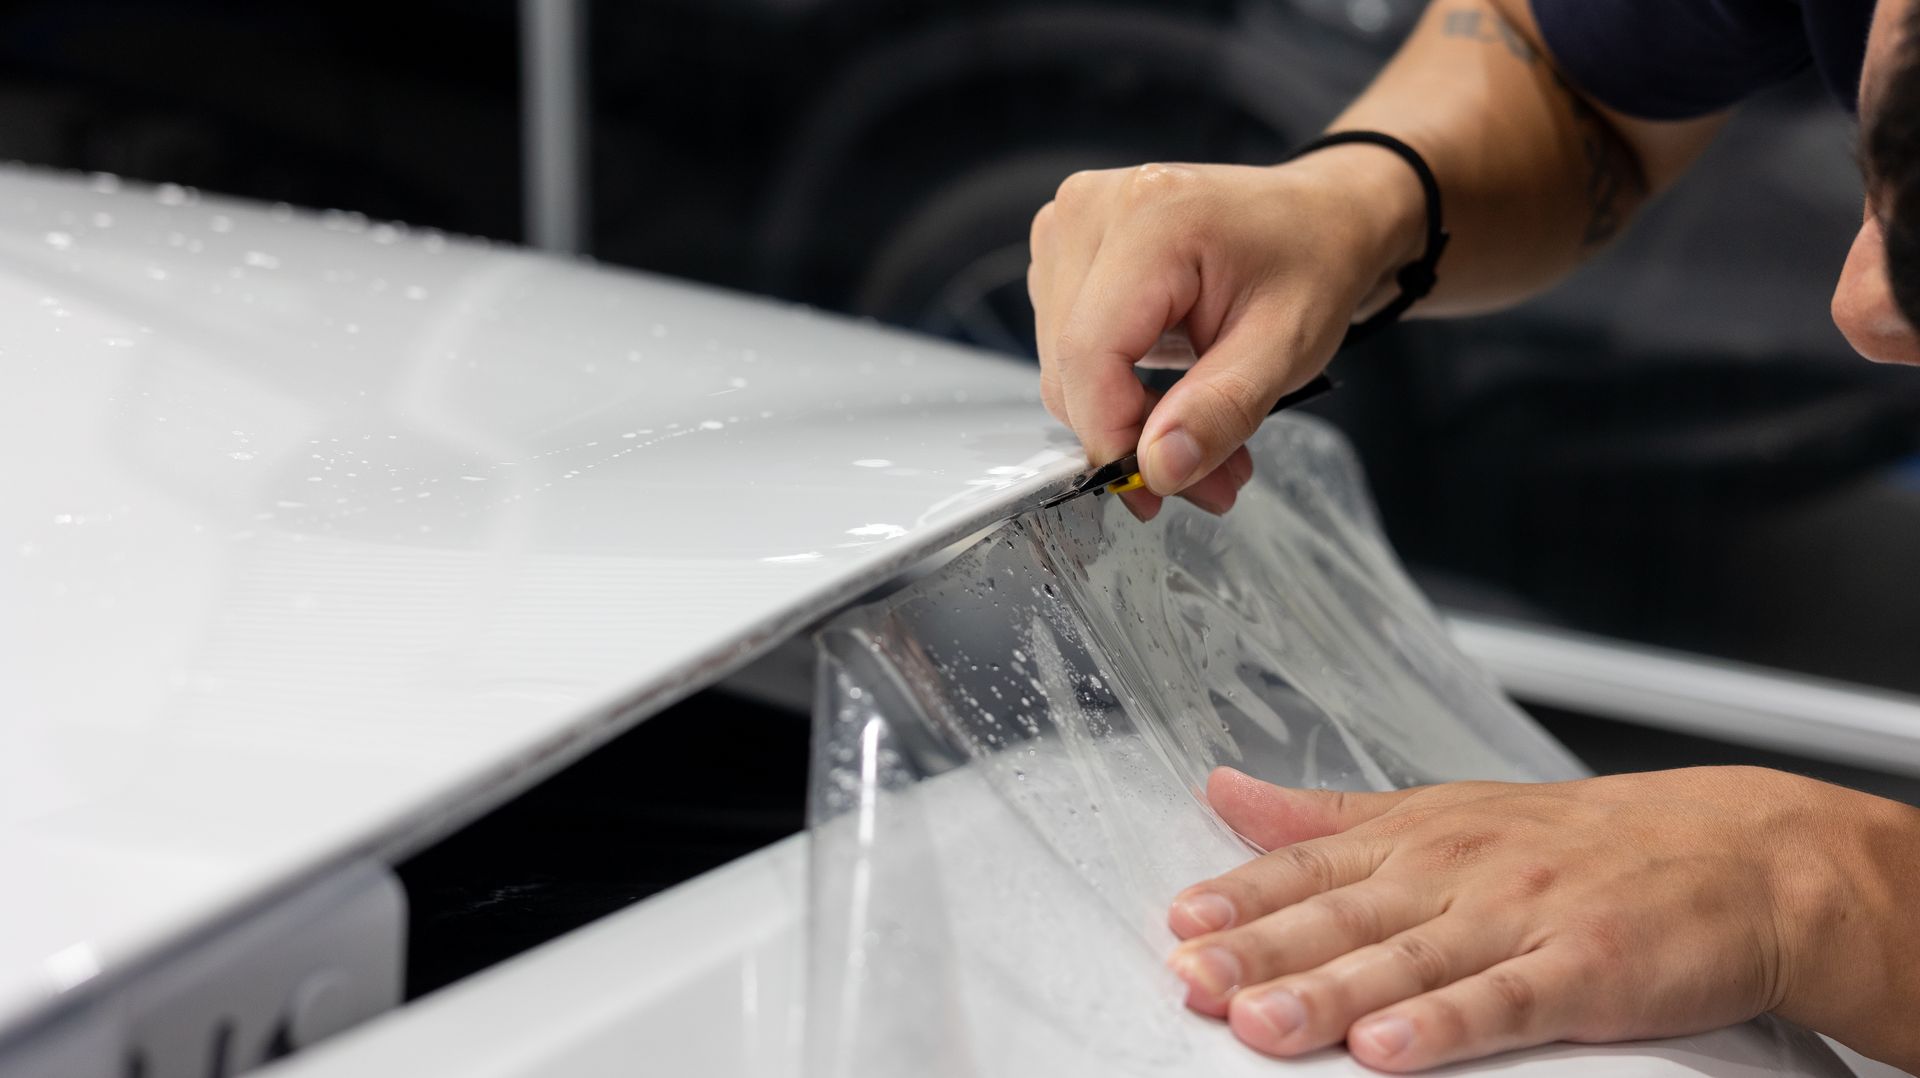
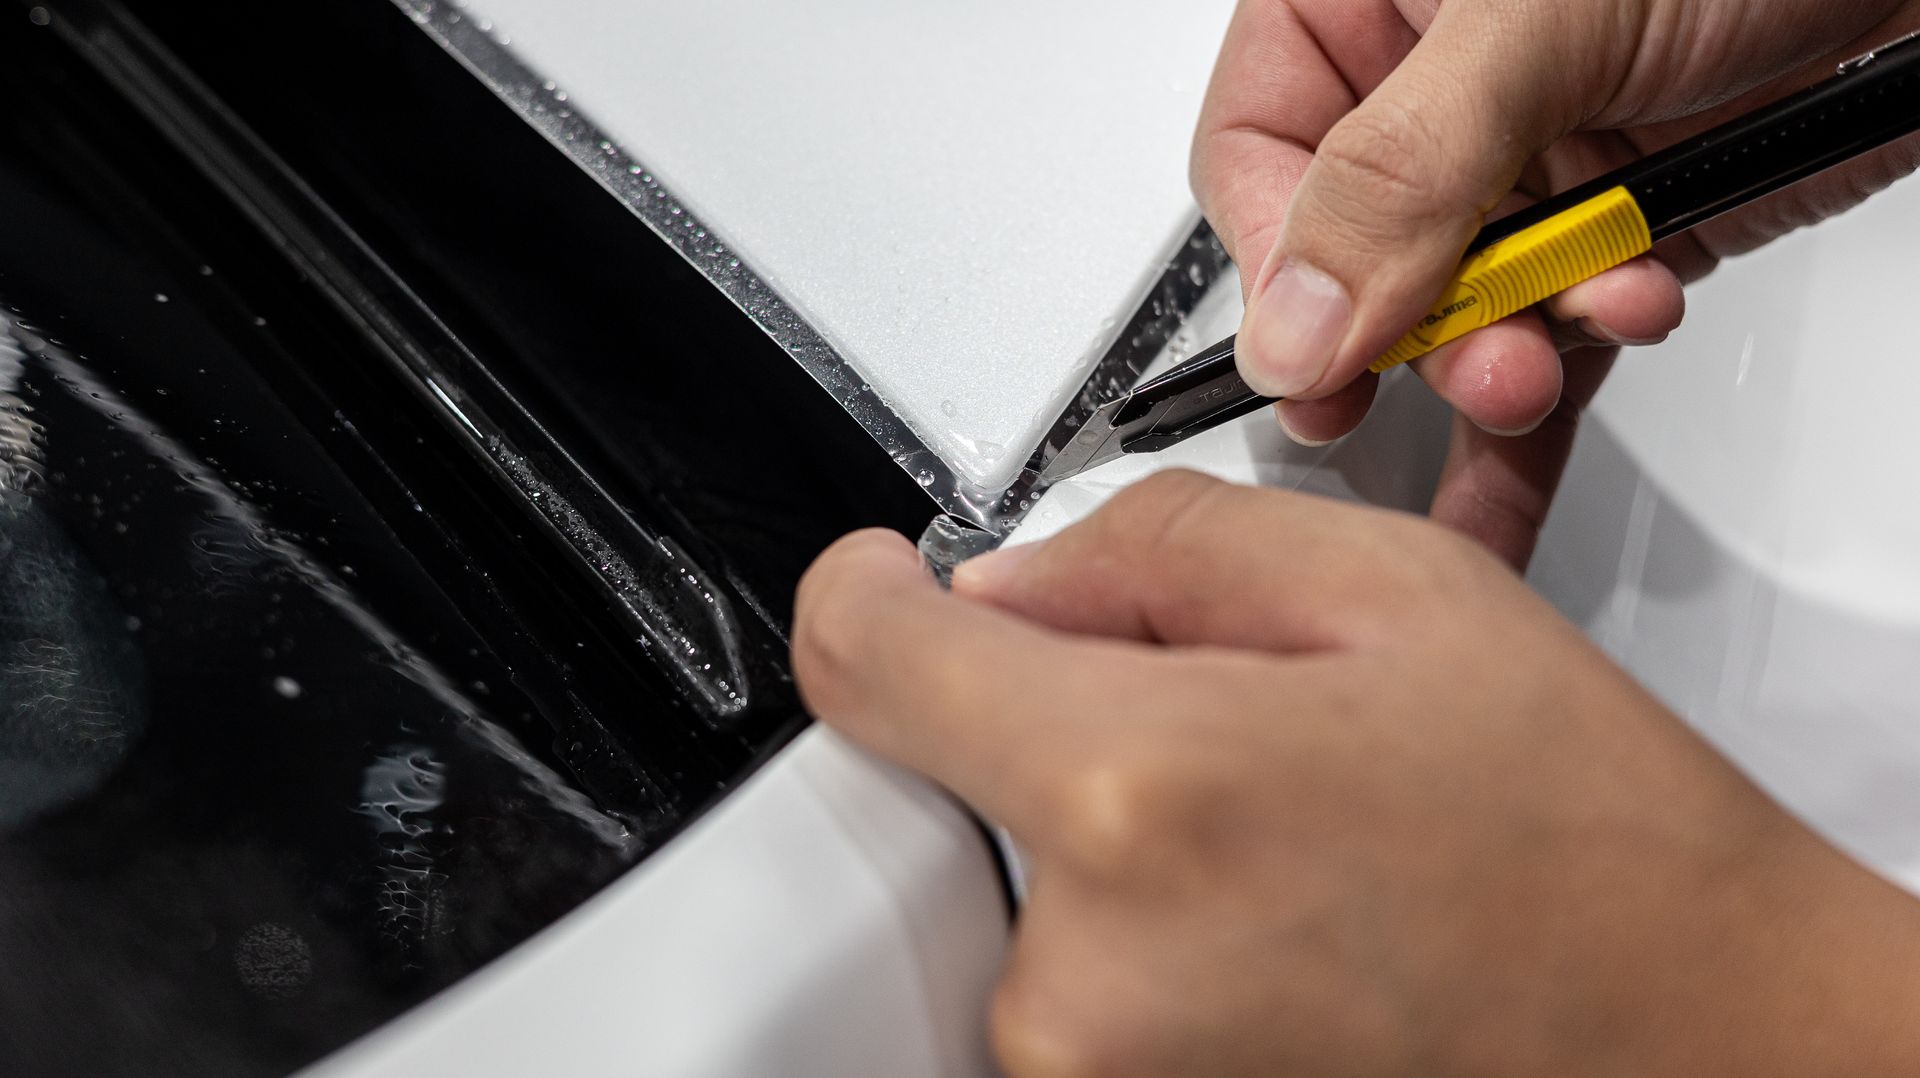
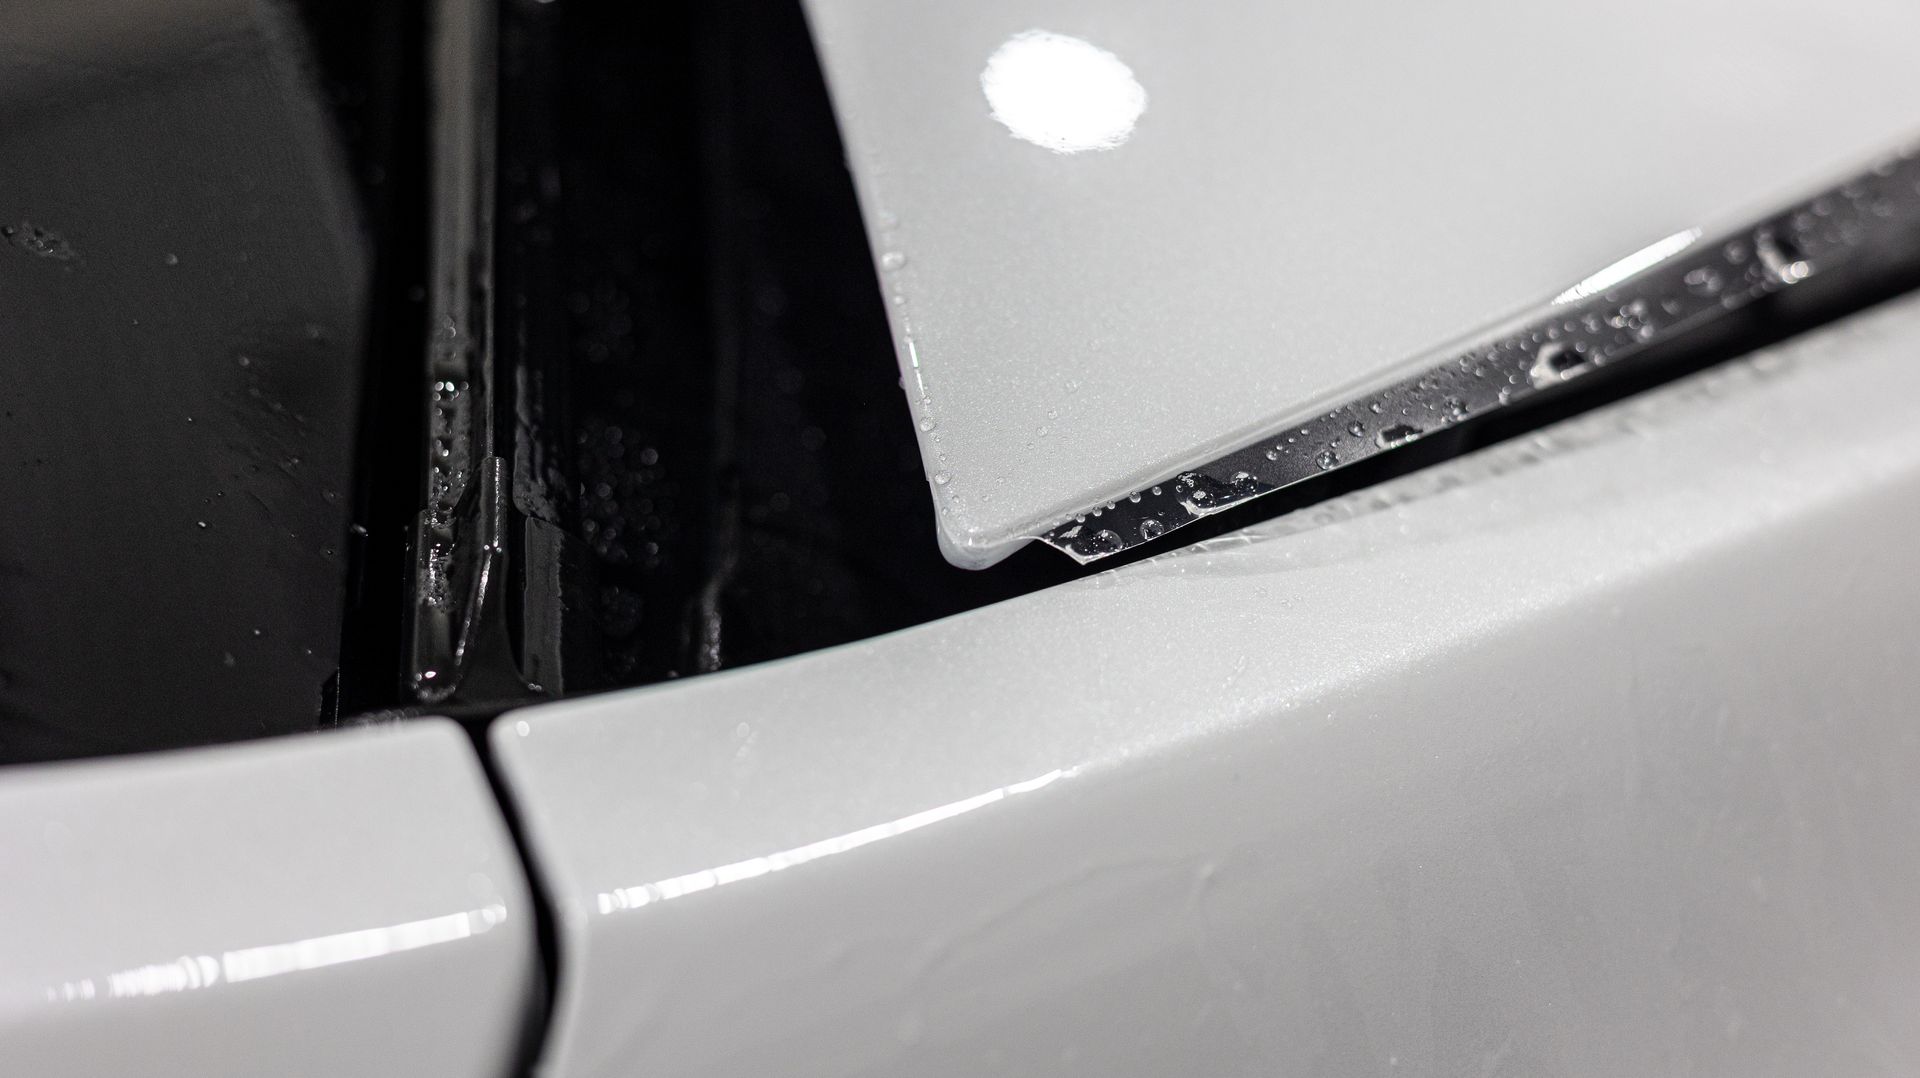
Here’s where the extra time in an install really shows—edge work, especially on white paint. You’ve probably seen cars where there’s a faint line a few millimeters in from the panel edge. On darker colors it can blend in, but on white it collects dirt quickly and starts to look like an outline. To avoid that, I wrap the film past the visible edge whenever the panel design allows, so the termination point is hidden underneath. When the edge is out of sight, there’s nowhere for grime to build up and the finish stays clean.
On this vehicle we also removed the front wheel well liners so the film could be wrapped deeper into the fender lips. That area still takes debris even though you don’t see it, and stopping at the visible edge leaves paint exposed. It takes more time to disassemble and reinstall those parts, but it allows the film to sit farther in, reduces the chance of future lifting, and gives more complete coverage. Details like that don’t stand out at first glance, but they make a difference in how the install holds up.
We Cut Corners—The Right Way
Corners are where most PPF installs either look factory or start to fail. It’s the point where the shape of the panel changes in multiple directions, and if you try to force the film to wrap it in one piece, it almost always shows. You’ll see thick buildup, faint tension marks, or edges that eventually lift once the car sits in the sun.
Instead of stretching the film and hoping it holds, I treat corners as their own step in the process. I lay the film normally, then make small, controlled relief cuts so the material can settle into the shape of the panel without fighting itself. After that, I heat and set each section just enough to wrap it cleanly behind the edge. It takes more time, but the result is a corner that sits flat, stays down, and doesn’t draw attention to itself.
In the photos, the film edge doesn’t bunch or wrap awkwardly around the corner. It follows the natural shape of the panel, sits flat, and holds its position without creating extra lift points. Each cut is intentional, and every corner is heat set so it stays locked down over time. No loose edges, no rework later.
I look at corners the same way you’d look at stitching on a tailored piece—if it’s done right, you don’t notice it at all. When the rest of the install is clean, those small details are what people’s eyes go to first, so the goal is for them to see nothing.
The Finished Result: Invisible, Durable, and Clean
When we finished this Model Y, you couldn’t tell anything was on it. That’s the point. It still looked like a brand-new Tesla—but now it has seamless protection baked in.
- The hood edges were fully tucked
- Every corner was tight and smooth
- No lifted edges, no exposed seams, no “halo” lines on the white paint
- And most importantly, it’s now protected from the road ahead
So should you buy PPF?
It's honestly going to depend on you. If you're keeping the car long term, or if rock chips absolutely bug you to no end on your new car, then PPF is well worth the investment. This exact install as you've read so far is $1999, backed with a ten year warranty that covers manufacturing defects and our craftsmanship.
— Jesse
Humble Crew Auto Spa
