
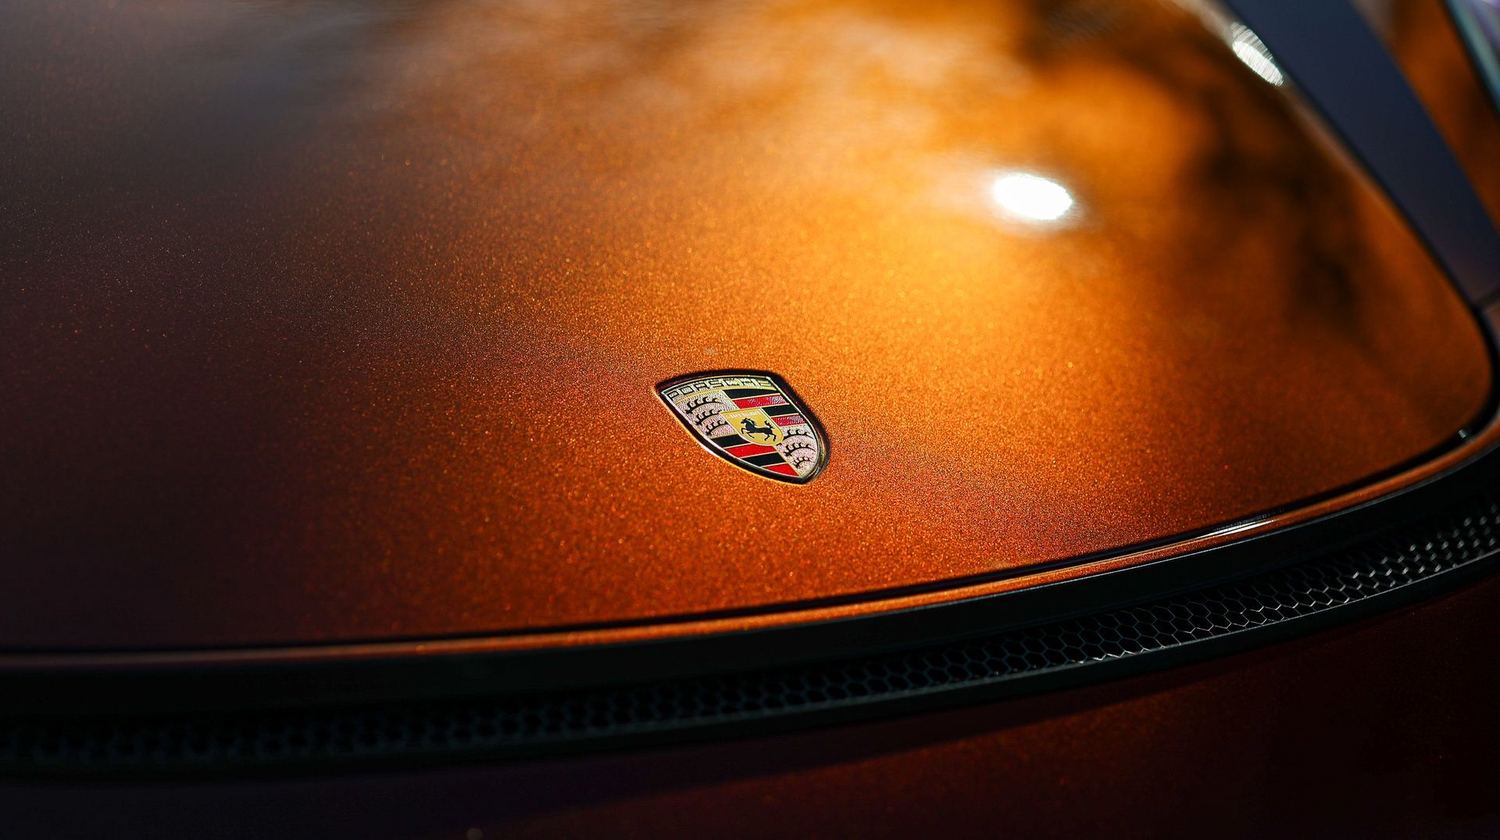
/ Journal · Humble Crew Auto Spa
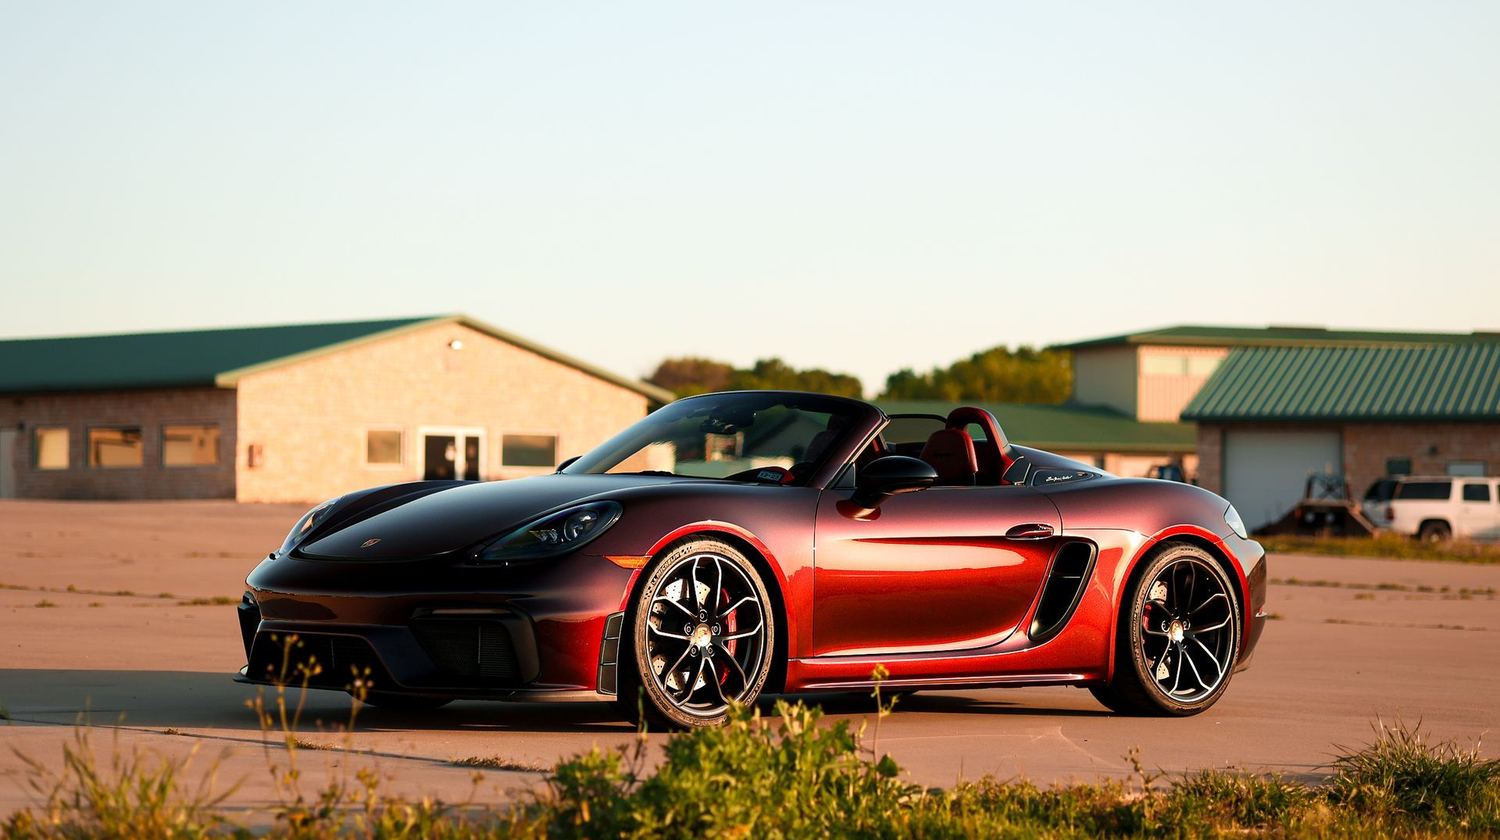
Full color PPF completely changes this 718 Spyder
Jesse Xiong·
$12000 PPF WRAP
Video transcript · 1,462 words
Today we've got an amazing project for you guys. This is going to be my 2020 Porsche Spyder that we just picked up. It's black with a maroon top, but we're going to be doing a total coloranging PPF on this car. We're going to do ultra fet Phoenix red front to back, and I'm going to show you how much work goes into a project like that.
And you guys know that I love my Porsches. So, when I sold my two 911s, I really wanted to replace it with something naturally aspirated. And I also wanted a convertible top. Now, to be honest, I don't really like uh 911 cabs. That's just not for me. So, when the deal came to buy the Spyder, it just fell in my lap.
I had to hop on it, right? So, we picked it up really recently from BMW of SU. You know, we brought it over here. Spec was perfect, right? that interior. It's got the classic spider interior and uh with the red top and black paint. And I already knew that we were going to be doing that color PPF on this car.
First things first, we got to start with a really good wash. We use a two bucket hand wash here. So, two buckets for the paint and the third bucket actually is for wheels. Uh we don't want those buckets to mix ever. So, the two buckets that we use for paint, we go through and hand wash the entire vehicle because when we're laying paint protection film, if we don't do a proper prep, that dirt that is in the seam will come out when we're spraying water and get under the film.
Obviously, that is really bad because you'll see a lump and you don't want that, right? So, when we are prepping, we take extra care to make sure that we not only clean with a mitt, we go through and clean crevices with a brush. And then finally, we clay bar the entire thing. So, now that the wash is done, what we're going to do is we have to take apart the entire car.
Paint protection film, especially when we're doing color, the tolerances are practically zero. It has to be as perfect as it can get because if not, you'll see the color underneath the paint, the wrap poke through, and you don't want that, right? So to get a clean tuck, we are going to be taking apart the front bumper, the rear bumper, the door panels, the mirrors, all of those panels.
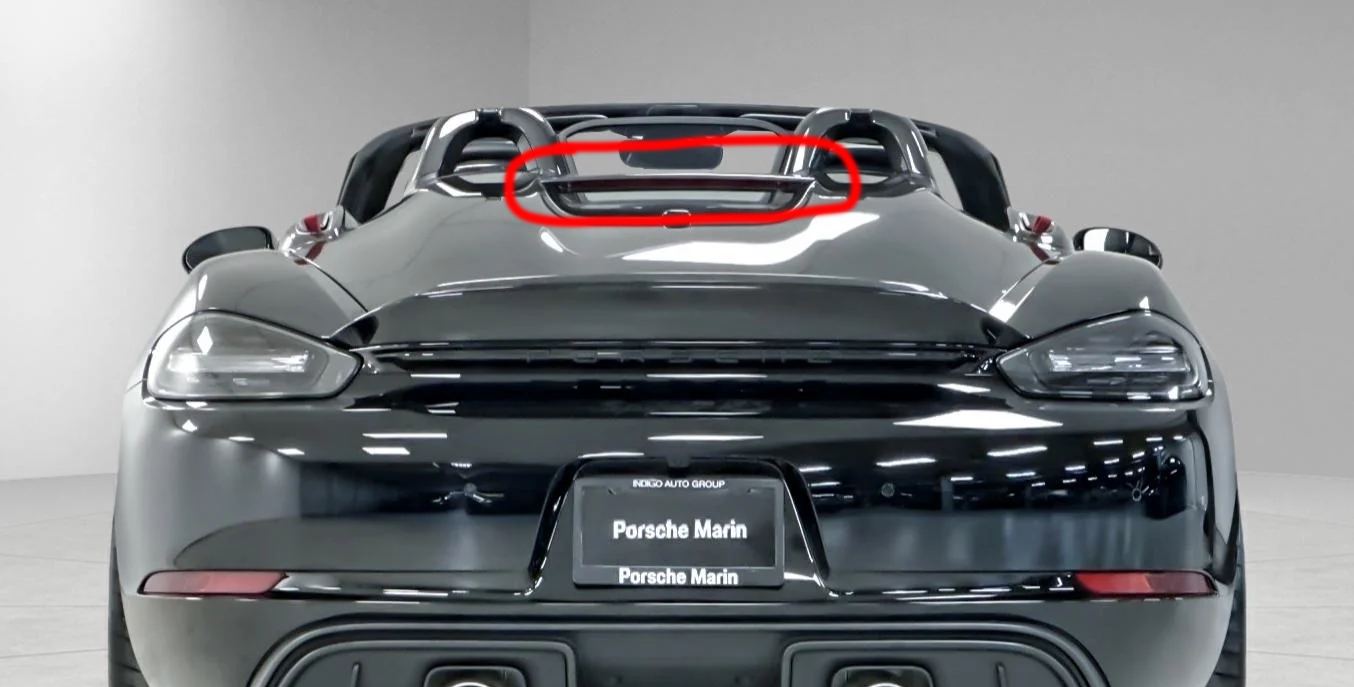
And on the Spyder 2, on the rear Huntresses, they have a bar that goes across. That's got to come out, too. So, a lot of the uh work here is going to be in reassembly and disassembly, but we're doing that so that we can get as clean of a tug as possible. And it's important that we do it this way.
Otherwise, again, you'll see the color underneath, and we don't want that. Now, it's time to lay the film. The whole car has been disassembled and it's prepped. Let's lay. When we're laying film onto cars, we have to immediately uh clean the panel before we uh lay the film. Even though we did a really thorough prep in the beginning, when we do the extra step to prepping right before we lay film, and this is really important because in the time that we pull the car inside, we've been working on the vehicle, dust and dirt has landed on the paint.
And we put film over that, you're going to see the bumps called contaminants in between the paint and the film. And we do not want that, right? We want this to be as crystal clear glass as possible. And that's why prep is so important during PPF, especially color PPF. So, as we're squeeging the film onto the panels, you can see we have to go step by step.
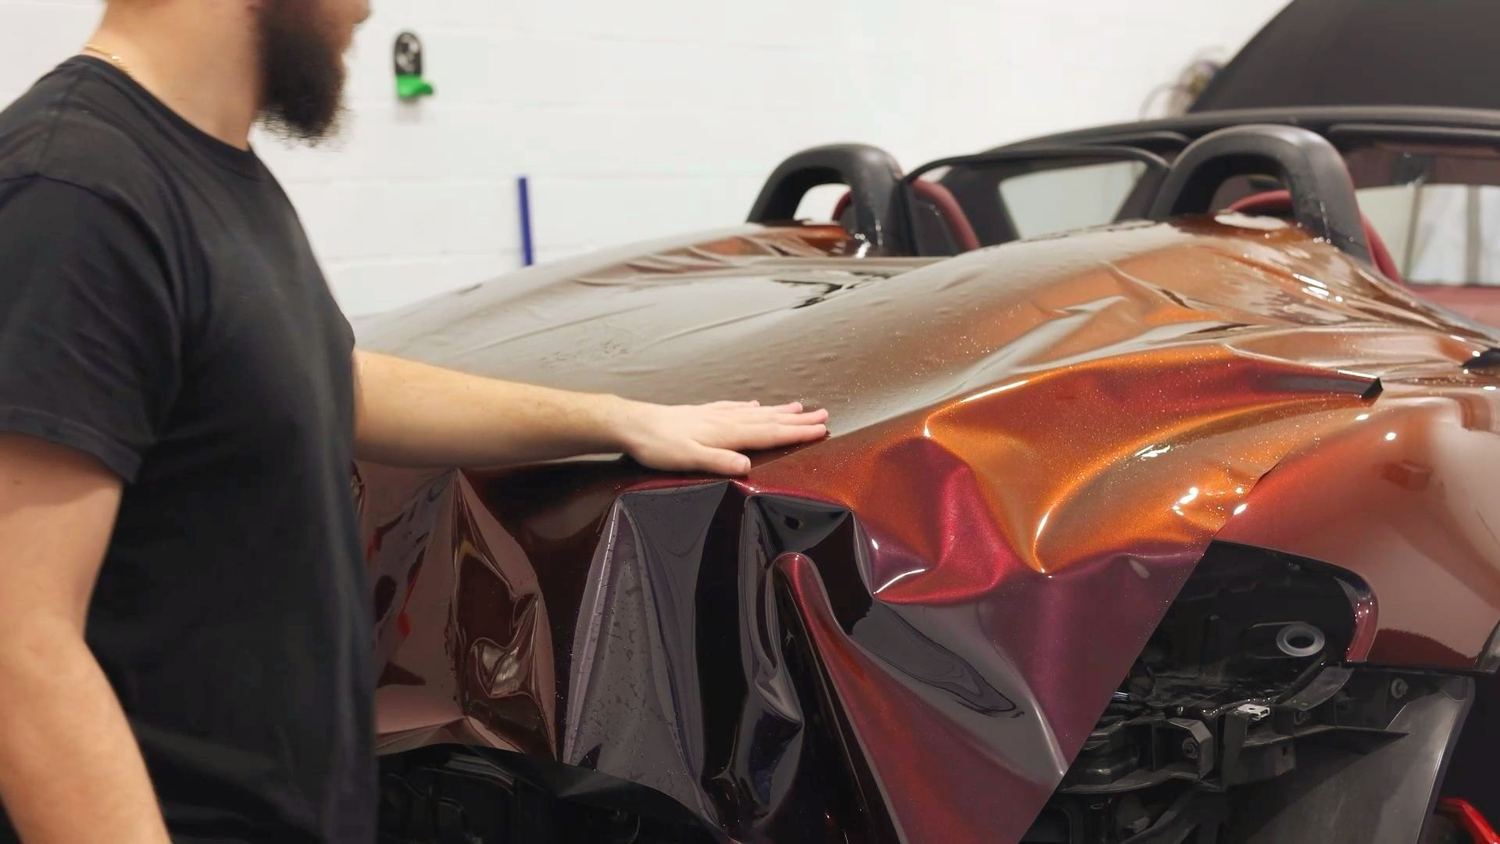
You have to spread the material out evenly to distribute the stress so that when you squeegee, it lays flat and clean. If you don't, a lot of times you can get what are called fingers, which are essentially excess material that bunches up like this. Right? So, the trick with paint protection film is to get this thick rigid material over a round edge and get it done smoothly.
Right? And when you're paying for color paint protection film, you want the experts who can do this the right way. Heat. Heat. Heat. Heat. Hey, hey, hey. Hey, hey, hey. The thing that my technicians are looking for are not only uh alignment with the PPF, make sure everything is going where it's supposed to go, but more importantly, we're also looking for contaminants.
So, things like dirt, dust, or hairs, or anything like that that might get trapped under the film, even though we cleaned it, we always have to keep an eye for that. So, as we squeegee, we're kind of going in little sections, piece by piece, and then finally, we move on to the edges. Now that the film has been laid, we're going to go ahead and start trimming.
So, as you guys can see, we're going to start trimming about maybe half an inch around the entire perimeter of the panel that we're laying. Uh, and once it's trimmed a little bit over, we're going to be tucking the film underneath. This is really good for two reasons. Uh, first and foremost, it looks amazing. You don't have any exposed edges, which means that the film looks as seamless as possible.
And for color, you can see how much of a difference that makes. It's also really good. And more importantly, it's more durable this way, too. So when you don't have exposed edges, those edges are far less likely to catch on anything and lift, which give it far better durability over time. And so once it is uh trimmed, tucked, now we move to seal it in with a heat gun.
So you can see we are heating all of these edges to bake it in. And once that heat sets on the film, the adhesive activates and it is locked in. Paint protection film. Although it might look good in my shop, uh, if we don't install it correctly and we don't distribute the stress evenly, uh, if it sees the sun, it's going to pop all back up, and we don't want that, especially for color PPF.
So, you're seeing us stretch the film in this, uh, B-roll here the right way. That way, we don't get any issues down the road. It's time to put this thing back together. This is really fun. It requires some paint protection film and detailing knowledge and pair it with some mechanical knowledge just to know where all the bolts uh and nuts go, right?
And make sure everything goes back where it's supposed to. We have everything sorted out so that uh we don't lose any of these bolts and we have them labeled as well. And so as we're reassembling, this is also just as tedious. But the project is almost done. It's coming together and I'll see you guys in just a moment here.
Let's go, guys. That was a project. Oh my goodness. We tore through the vehicle, prepped it, cleaned everything, laid the film, and then reassembled everything nice and neat, tucked all of our edges, and now we have this beautiful install. Every time I go to a car show, people are asking, "Man, Jesse, is that is that a new painted sample?
I've never seen that. Wow, it looks like paint." Paint protection film, especially color PPF, is thick enough to look like paint, protect your vehicle like PPF, and last a long time. So, if you guys are looking for a truly unique way to give your car not only the protection it deserves, but a color that is going to rock your cars and coffee, this is the way to go.
This job, in case you're curious, took over a week to do. I mean, this is not a fast turnaround job. I mean, you guys, I mean, obviously just watched the video, but it was about 100 labor hours uh that went into this project. It was ridiculous. But the end result is super worth it. Uh jobs like this generally will range anywhere between nine and 13,000 depending on the car because it is just so much labor.
But if you want the best and you want something unique, nothing quite beats this. It's Jesse at Humble Crew Auto Spa signing out.
Full Color PPF completely changes this Porsche 718 Spyder
What happens when you combine the best form of paint protection with a unique finish that resembles a high end paint job? That's what Jesse wanted with his new-to-him Porsche 718 Spyder. We transformed his car with a full-body Ultrafit Phoenix Red color PPF installation.
The process was superbly grueling, and this project took over 100 man hours of labor, involving full disassembly, bulk film installation, edge wrapping, and a finish that looks indistinguishable from custom paint. Here’s how we did it.
Why Ultrafit Phoenix Red?
Ultrafit’s Phoenix Red delivers on all fronts:
- A head-turning color shift and high-gloss finish that goes from Burgundy into a deep Gold color
- Durable self-healing surface
- UV protection and long-term clarity
- And most importantly: PPF-level impact protection with the look of a luxury repaint
It’s the best of both worlds: style and substance.
Disassembly: Total Panel Access. Prepare your wrenches.
To achieve a flawless look, we fully disassembled the Porsche — a step skipped by many but absolutely essential for pro-level results.
We removed the wheels and wheel liners, detached the underbody screws and frunk bolts, popped out the side markers, removed the headlights, and gently slid the bumper off after disconnecting electricals — all to ensure the bumper could be fully wrapped without seams or exposed edges.
Rear Bumper (I hate this part the most):
Taking off the rear bumper is a bit of a process. First, we remove the spoiler to access the tail lights. Once the tail lights are out, we can get to the bolts that hold on the Porsche light bar that runs across the back — that comes off next.
After that, we remove all the bolts and clips holding the bumper on, including some underneath and inside the fender liners. Once everything is disconnected, we carefully pull the bumper off.
Removing the rear bumper on the 718 Spyder is already a bit of a process — but separating the rear diffuser from the bumper is honestly one of the biggest headaches. That diffuser is tightly secured with clips and bolts, and it sits in some pretty tight spots, so getting it apart without damaging anything takes patience and finesse.
You have to carefully work around hidden fasteners and use pry tools to loosen it without cracking or scratching the parts. It’s a slow, delicate job, but it’s totally worth it because separating those pieces lets us wrap the rear bumper perfectly and tuck the film edges out of sight for a clean, factory finish.
Door Handles:
To get the door handles off, we first take off the interior door panel. Once that’s out of the way, we can reach behind and disconnect the rods and cables that link the handle to the latch. After that, it’s just a couple of bolts and the handle slides out from the outside.
Side Mirrors:
For the mirrors, we pop off the little triangular trim piece on the inside of the door. That gives us access to the bolts holding the mirror in place. We unplug the wiring (for power and heating), undo the bolts, and then pull the mirror straight off.
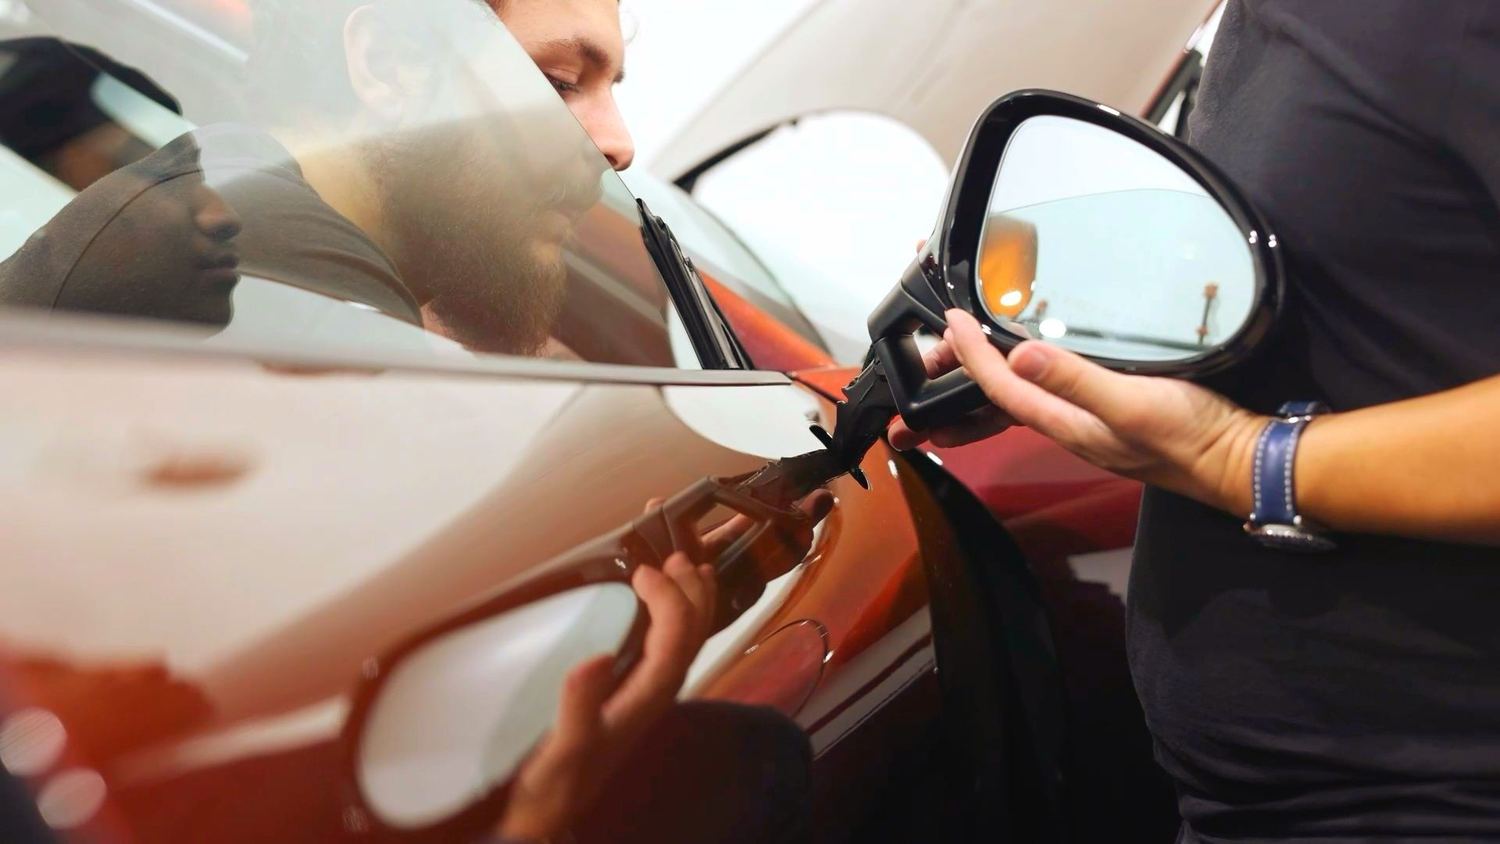
Disassembling the Rear Plastic Bar Between the Trunk “Humps”:
On the Spyder’s rear trunk, there’s a plastic bar that connects the two raised humps near the roll hoop covers. This piece needs to be removed to fully access and protect the trunk area during the PPF install.
Removing it involves carefully loosening several hidden bolts and clips that secure the bar in place. Because it fits snugly between the humps and under the roll hoops, it takes some patience to gently pry it free without damaging the plastic or surrounding paint. Once removed, it exposes the full surface so we can wrap the film cleanly around these complex curves and edges.
This step is tricky but necessary for full coverage without any seams, and cannot be done without this tedious step.
So with all of that out of the way, now we can finally get to laying some film.
This is where expertise matters. We did a bulk installation, which means minimal pre-cut kits, no shortcuts — just precision film handling with every piece custom-fitted by hand.
Every installer has their style, but here are our key principles:
- Soft-edge squeegees are ideal for initial lay-downs to avoid micro-scratches.
- Firm-edge squeegees (using the backside of our rubber squeegees) are used to push out slip solution and seal the film to the surface. This step is important, and we do it as an "insurance" swipe to get rid of any small bubbles that might've slipped our eyes.
- We always work from the center outward, using overlapping passes in controlled, even pressure strokes — never dragging too far or skipping zones to prevent air trapping.
Corners are where most installs fail — but here’s how we make ours disappear:
- Overwrap the edge by ¼–½ inch, then post-heat gently.
- Use a sharp blade to relieve the corner with a single 45° cut right underneath the corner perimeter, on the bottom side. This gives us a very tight corner that either tucks or goes all the way to the edge of the panel.
- Tuck each flap down separately using a soft glove or squeegee tip, then seal it with heat to lock it in place.
This keeps corners tight, clean, and resistant to peeling or lifting over time.
Post-Installation Cleanup & Lock-In Process
A PPF job isn’t finished when the film’s on — the finish work is where the job earns its value.
- Post-heating: Every wrapped edge and corner is gently reheated to activate the adhesive and “lock in” the film, preventing future lifting.
- Edge sealing: We inspect all door jambs, gas caps, hood lines, and wheel arches to ensure no moisture or air remains trapped. This is done at the same time as the post-heating step.
- Panel alignment check: Everything we removed earlier needs to go back on. After reassembly, we confirm that all removed parts fit flush, ensuring OEM-level appearance. On German cars in particular, if your clips aren't 100% lined up, you'll see the fitment slightly off, striking your OCD alarm. Let's just say we sat there for a while and stared at the car over a less-than-1mm gap.
Holy cow we are done.
After over 100 hours of labor, we are done with this install. It was beyond tedious, and completely non-standard for PPF installs (most of the time). With color PPF, you really can't get away with a standard install, as the original color will poke through if you don't get full coverage. The end result is a car that really turns heads at car shows, all while being fully protected from most of the wear and tear it'll experience on the roads and on the track (that's right, Jesse tracks this car). Color PPF is one of the most labor and skill intensive trades in this field, requiring patience, precision, and technique. The idea here is that if we're good at color PPF, we're probably pretty decent at regular clear bra too. Speaking of which, if you want to get your car with us, you can send us an inquiry by clicking here. Talk to you soon!
Want this on your car?
Pick your service and your time, or call the shop and talk it through first.